Home
All Speed Tips
Other Tips
Optimization Software
Tech News
Internet Security
Ask The PC Expert
Computer Jargon
Contact Us
Subscribe via Email
Subscribe via RSS

Recent Articles
Learn To Repair PCs With The Right Course
Buying a Refurbished PC
How to Optimize Droid Razr Battery
|
|
Connecting two computers on LAN with no Hub or Router
Note: If you have an ethernet hub or router, it is simple to network multiple computers together. To network a group of computers using an Ethernet hub, first connect an Ethernet cable into the ethernet unit, then connect the other end of the cable to each computer's network interface card (NIC). All Ethernet hubs accept the RJ-45 connectors of standard Ethernet cables.
Nowadays, we need to connect two or more PC's for various reasons. You may need to set up a LAN or Local Area Network in your office, or you simply may need to connect your Desktop PC to your laptop at home. You also may be a student and want to play games on a network environment with your friends. Many reasons can be put to justify the need of connecting two or more computers on LAN.
First of all, there are various ways to achieve this task. Mainly the process can be divided in terms of wired LAN and wireless LAN. Here in this tutorial we will be talking about wired LAN. In case of a wired network, you normally use cables to physically connect two or more computers. Here we will see how to connect two computers.
To connect two PC's via wired LAN, you need to have Ethernet cards installed on both systems. Nowadays, normally, all computers come with Onboard LAN Cards i.e. Ethernet LAN cards are installed on the motherboard itself by the manufacturer. If your motherboard doesn't have one, then you just need to buy one external Ethernet card and connect it to your computer. Ethernet cards look like simple video cards and can be easily plugged into motherboard slots. If you run into some sort problem while installing a new one, then get some professional help in doing this. There are other protocols in which you can connect more than two computers, but using Ethernet cards is the easiest of them.
After having Ethernet cards installed on your system, you will need LAN cables to connect both the PC's. For this sort of connection, we need crossover cable. Just let the retailer know what you need and he will give you the required crossover cable. Actually setting up a network involves many critical steps at various levels, so we will try to keep it as simple as possible.
Now it's time to configure your systems to talk to each other. We are assuming that both PC's are running on Windows XP Platform. To do so follow these steps,
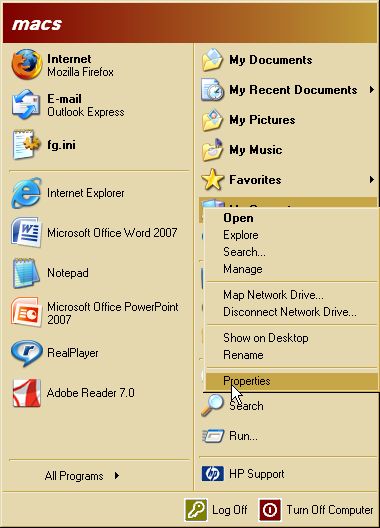
Start one PC and go to "Start" -> "My Computer". Right click on that option and go to "Properties". See below,
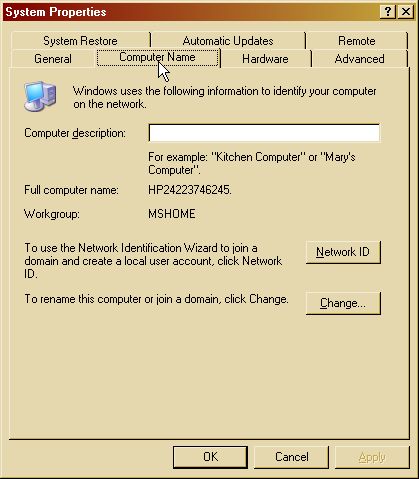
Click on the "Computer Name" tab available in the top and you will be presented with the following window:
Again, click on the "Change..." button and the following dialog box will pop up. Make sure you are logged onto the system under administrative privileges.
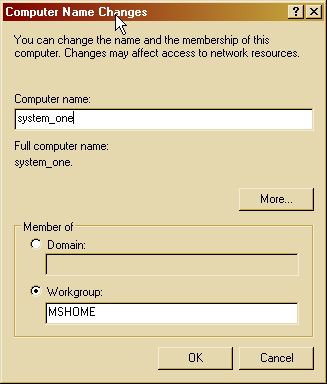
Here you will see one text field under the name of "Computer Name". You must have given a name to your computer while installing Windows XP; otherwise Windows would have assigned a default one. So, when you are working in a network environment, it is always better to assign each system on the network names in a series. For example, first system gets system_one, second one gets system_two, etc.
In the same dialog box, in "member of" area, you will find another option called "Workgroup". It's Windows way to group systems on a network in similar groups. By default, the name will be kept as "MSHOME" or "WORKGROUP". If you want, you can change it. Normally, all the systems should be assigned to the same workgroup. So, after configuring your system on this dialog box, hit on "OK".
Now, your first system is configured to be a part of a network. Log onto the second machine and do same as you did for the first system. Make sure you keep both systems under the same workgroup and the names of each computer should be different, otherwise Windows XP would report a name conflict error!
After having both systems configured properly, it's time to connect them physically. So, plug the crossover cable into both systems. Normally when you do so, Windows XP should report a new LAN connection automatically and from there on you can configure your LAN. If it doesn't, then go through the following steps.
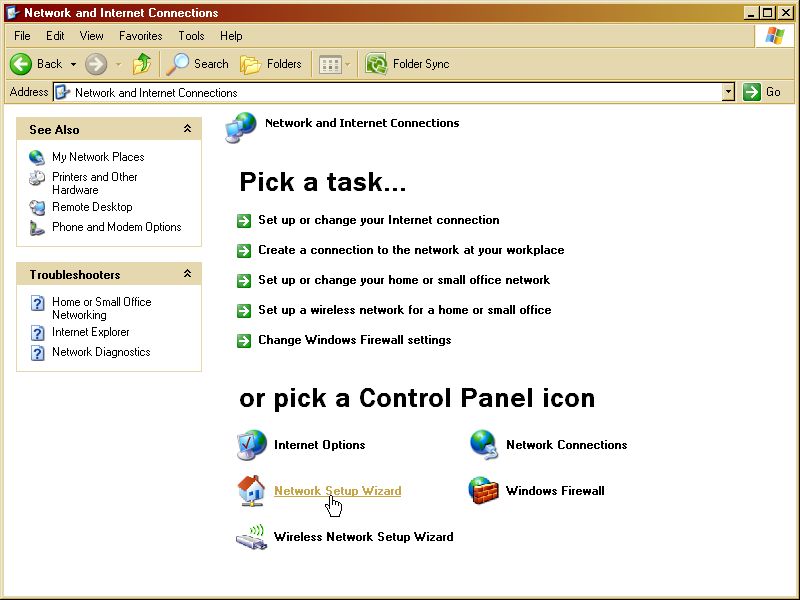
Open your "Control Panel" from "Start" menu. Click on the following item "Network and Internet Connections". The following window will show up,
Here under, "Pick a Control Panel icon" you will see an option for "Network Setup Wizard", click on that. The following window will open up,
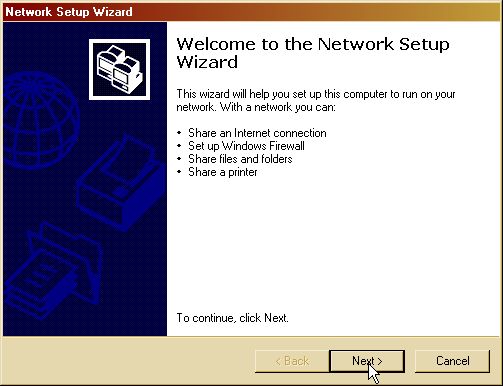
You will see a general introduction on the page itself. Just have a look at it or simply go to "Next" item. You will get following page,
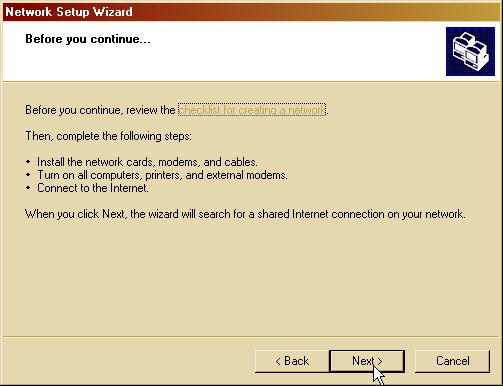
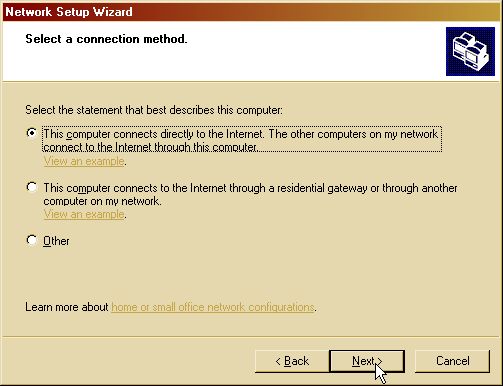
Again, simply click on "Next". The window which opens up is the most important one. Here you let your system know which type of network you are connecting to. Here, we are simply connecting two PC's to share files and resources. So, you should go for the first option which says "This computer connects directly to the Internet...". Do not worry about the details. If one of your systems happens to have an Internet connection, the other computer can share this internet connection. After having this option selected, just leave all other options as they are on the following pages and finish the Wizard. Have a look on the following screenshot,
After you finish the wizard, open the "Network and Internet Connections" again in the control panel. You will see an option named "Network Connections", click on that and the following dialog box will open up,
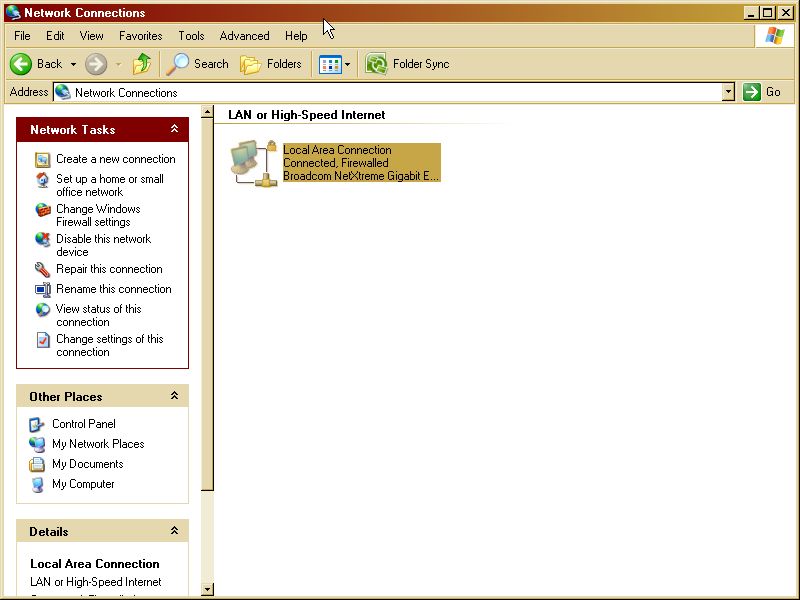
Here double click on the icon which says "Local Area Connection", you will get the following box.
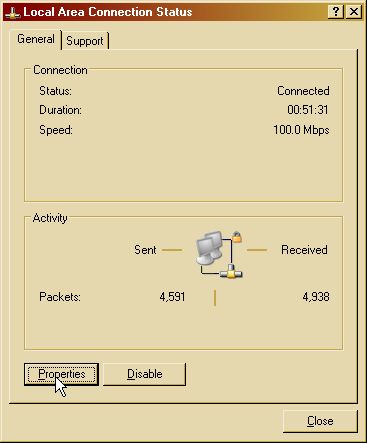
Click on the "Properties" tab as shown below,
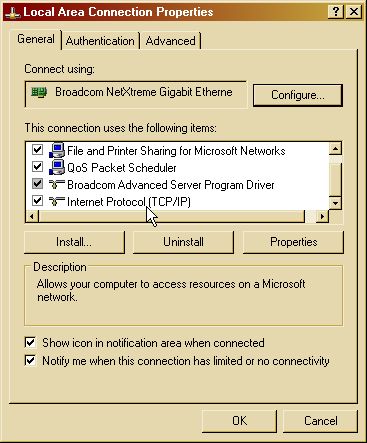
In the middle, you will see a scroll bar under the area named "This connection uses the following items". Go down the scrollbar and you will find an option called "Internet Protocol (TCP/IP)". Double click on it and the following window will open up,
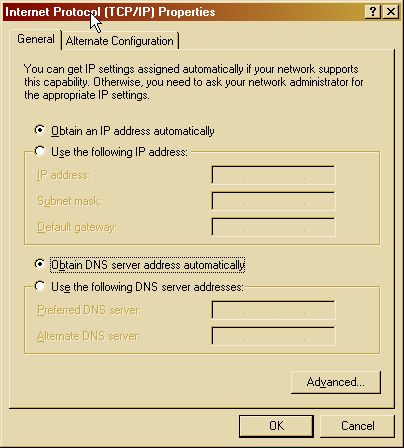
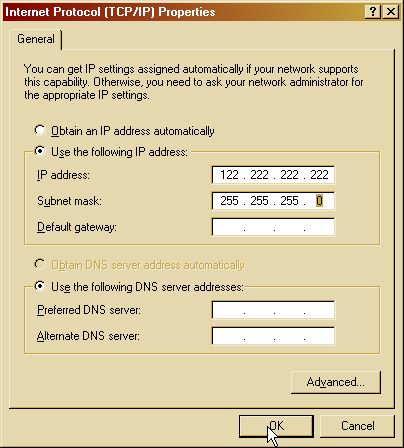
Here by default you will see the following option selected, "Obtain an IP address automatically". Check the following option which says "use the following IP address" and 3 text areas will get highlighted. Under the field named "IP address", put an IP address of your choice like, 192.168.1.1. Always remember each system on a network should be assigned different IP addresses or else windows will report an IP address conflict error. So for the second system when you put the IP address, make it something other than 192.168.1.1 or the IP address of the first system. An example for the second system would be 192.168.1.2. Next, on the second tab which says "Subnet mask", keep the following entry 255.255.255.0 or the one which comes by default when you click on that. Make sure both the systems are assigned the same subnet mask. Now the IP configuration window should look like the following one and click on "Ok" button.
Again, click on "Ok" on the "Local Area Connection Properties" dialog box.
Repeat the same steps for the second PC. Both of your computers should be connected by now. You can share files on both the systems or play games. If you want to connect more than two PC's on network, then you will need a Hub or extra Ethernet Cards installed on the Systems. For connecting only two PC's, your onboard Ethernet cards will be enough.
If you enjoyed this post, please
or
|
-By Dominic
Web site and all contents © Copyright ComputerTooSlow.com 2012, All rights reserved.
|
|